I may earn a commission at no extra cost to you. #ad
Free Guide: Designing Immersive Post-Apocalyptic Environments for Haunted Attractions
Jump to Section
The Core Principles of Post-Apocalyptic Storytelling
Designing a post-apocalyptic environment isn't just about throwing trash on the floor; it’s about environmental storytelling. Every piece of debris should tell a story of what happened when the world ended. To create a truly immersive haunt, you must focus on three pillars: Decay, Scarcity, and Reclaimed Nature.
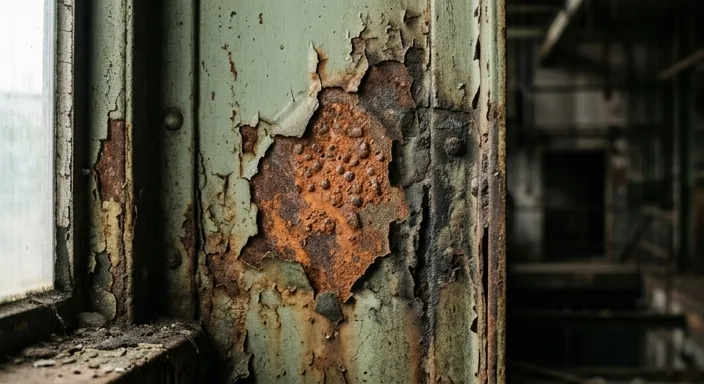
Decay involves the physical breakdown of man-made structures. Think water damage, peeling wallpaper, and rust. Scarcity is shown through "resourceful" repairs—using duct tape, scrap metal, and mismatched boards to fix things. Finally, reclaimed nature reminds the guest that humanity is no longer in charge. Vines growing through windows or dirt mounds in a hallway signal that the world has moved on.
Advanced Weathering and Texturing Techniques
The secret to a professional haunt environment is depth. Flat walls kill immersion. To fix this, haunt designers use "texture mud"—a mix of joint compound, sawdust, and dark paint—to create the look of rotting drywall or soot-covered concrete.
For metal surfaces, don't rely on brown paint. Use real iron filings mixed with an oxidizing agent to create authentic rust. If you are on a budget, the "tea-staining" method works wonders for fabrics, turning pristine curtains into 20-year-old rags. Remember the rule of the "High-Traffic Grime": focus your darkest weathering around door handles, light switches, and corners where people (or creatures) would naturally brush against the walls.
Lighting: Darkness as a Tool
In a post-apocalyptic setting, lighting should feel accidental or failing. Avoid standard wash lighting. Instead, use point sources that mimic flashlights, flickering emergency lights, or "moonlight" streaming through cracks in the ceiling.
Use LED flickering modules to simulate short-circuiting wires. This not only adds visual interest but creates a rhythmic tension that sets guests on edge. Strategically placed "god rays"—narrow beams of light cutting through a hazy atmosphere—can highlight specific props or scares while keeping the rest of the room in terrifying shadow. The goal is to make the guest feel like their vision is compromised, forcing them to rely on their other senses.
Spatial Psychology and Chokepoints
The layout of your environment dictates the guest's heart rate. Wide-open spaces in a post-apocalyptic haunt create a sense of exposure and vulnerability, while tight chokepoints create claustrophobia. For maximum impact, use a "compress and release" strategy.
Force guests through a narrow "ventilation duct" or a cluttered hallway filled with hanging laundry and debris, then dump them into a larger, desolate room where they feel completely unprotected. Use verticality to your advantage; placing "snipers" or zombies on elevated catwalks makes guests feel small and hunted. Ensure that your "scare pockets" are hidden behind environmental obstacles like overturned refrigerators or stacks of rusted barrels.
Adding the Final Sensory Layers
True immersion engages all five senses. Beyond the visuals, sound and smell play a massive role in convincing the brain that the environment is real. For sound, move away from generic "spooky" music. Use low-frequency ambient drones mixed with the sounds of dripping water, distant metal clanging, and the hum of a dying generator.
Smell is the most powerful memory trigger. Using scent dispensers with "Rotting Decay," "Burning Rubber," or "Musty Basement" aromas can physically nauseate guests and heighten their fight-or-flight response. Finally, consider tactile elements. Having guests brush against "damp" plastic strips or walk on soft, uneven flooring (using foam under carpet) makes the environment feel unstable and dangerous.
Frequently Asked Questions
Using a spray mixture of highly diluted latex paint (blacks, browns, and greens) and applying it with a pump sprayer is the fastest and cheapest way to create 'grime layers' over large surfaces.
Always maintain a clear 44-inch egress path. Use soft props (foam instead of metal) for anything within 3 feet of the guest path, and ensure all 'debris' is securely fastened to the floor or walls.
A mix of sodium-vapor amber (high-pressure sodium look) and cool mercury-vapor blues/greens creates a realistic 'failed power grid' aesthetic.